Troubleshooting Common Diamond Painting Mistakes
Welcome to the vibrant world of diamond painting, where small, sparkling diamonds come together to form beautiful images. It's a hobby that combines color and creativity, offering a special kind of satisfaction as you see your artwork come to life. But even the best of us run into small problems now and then. Whether it's a misplaced diamond or a canvas issue, knowing how to fix these mistakes can make your crafting time much more enjoyable.
In this blog post, we'll dive into the essential techniques for troubleshooting common diamond painting mishaps. From setting up your workspace to perfecting the final touches, we'll cover all you need to keep your crafting as flawless as your finished product. Whether you’re just starting out or you’re looking to refine your skills, this guide is packed with practical tips to help you overcome challenges and make the most of your diamond painting adventures. So, grab your toolkit and let's get those problems sorted, one shiny diamond at a time!
Working on Diamond Painting
Creating a beautiful diamond painting starts with a well-prepared workspace. A clean and organized area not only makes the crafting process smoother but also enhances your overall enjoyment. Let’s explore how to set up your space effectively and keep your materials well-organized.
Setting Up Your Space
A tidy workspace is crucial for a clutter-free mind, especially when dealing with numerous small diamonds. Begin by clearing your crafting area of any unnecessary items. A dedicated space reduces the risk of losing diamonds and allows you to focus more on your artistry.
LightingGood lighting is essential in diamond painting to help you see the symbols clearly and match the diamonds correctly. Natural light is best, but if that's not available, a bright daylight lamp can make a big difference. Aim for a setup that minimizes shadows and reduces eye strain.
Seating
Comfort is key when you're spending hours on a project. Choose a chair that supports your back and allows your feet to rest flat on the floor. If possible, use an adjustable chair so you can easily change your position and maintain comfort throughout your crafting session.
Organizing Materials
Keeping your diamonds, tools, and adhesives organized can streamline your diamond painting process and save you time.
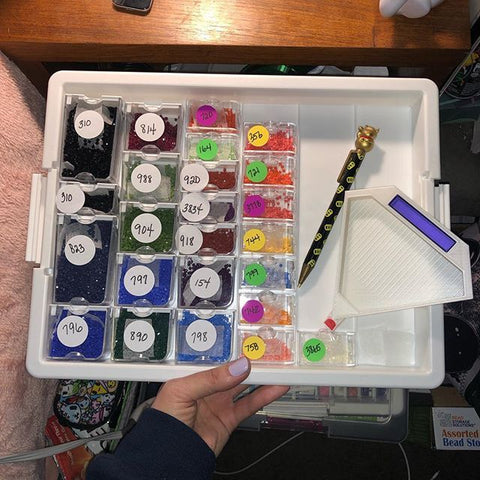
Sorting and Storing Diamond Drills
Use sorting trays or small containers to organize your diamonds by color and number before you begin. This will make it easier to find the right diamonds when you need them. Some crafters use labeled bags or boxes for diamond storage, which can be especially helpful for larger projects.
Keeping Adhesives and Tools Handy
Designate a specific area on your workspace for your tools and adhesives. A small, shallow container or a magnetic strip can keep your diamond painting pen, tweezers, and wax within easy reach. Ensure that your adhesive wax or gel is covered when not in use to prevent it from drying out.
Common Diamond Painting Mistakes and How to Fix Them
Diamond painting, like any art, sometimes comes with its set of challenges. Recognizing these common mistakes and knowing how to address them can help maintain the quality and beauty of your artwork.
Misplacing Diamond Drills
It's easy to drop a diamond in the wrong spot or misalign it. Here's how to handle misplaced diamonds:
- Correcting Misplaced Diamonds: If you notice a misplaced diamond, gently use tweezers to lift it off. If it’s stubborn, slightly dampening the tip of the tweezers can help grip the diamond better. Always be gentle to avoid damaging the canvas.
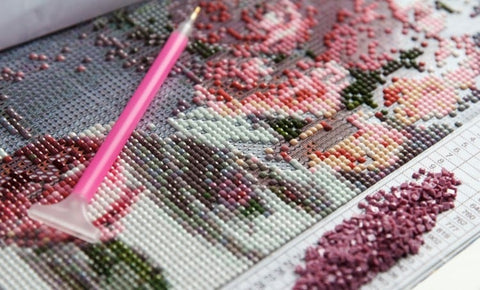
- Tools for Diamond Placement: A good pair of precision tweezers and a quality diamond painting pen are essential. Some crafters also use a light pad underneath the canvas, which illuminates the grid and symbols, making it easier to place diamonds accurately.
Wrong Diamond Color
Using the wrong color can disrupt your design. Here's how to correct and avoid this mistake:
- Steps to Follow: If you've placed a wrong color diamond, remove it using tweezers. Check the symbol and corresponding diamond color on your chart before replacing it with the correct diamond.
- Prevention Tips: Always double-check the symbol on the canvas with your diamond drill chart before starting a section. Keeping your working area well-lit can also help you distinguish between colors that are similar.

Diamond Painting Canvas Issues
A smooth canvas is key to a successful diamond painting.
- Dealing with a Creased Canvas: Gently iron the back of the canvas on a low setting with a thin cloth to protect it. Ensure the canvas is iron-safe and avoid direct heat while removing diamond painting creases.
- Adhesive Issues: If the adhesive on the canvas isn’t sticky, you can use a small amount of spray adhesive or double-sided tape. Test any new adhesive on a small area first to ensure it doesn’t damage the canvas or affect the diamonds.
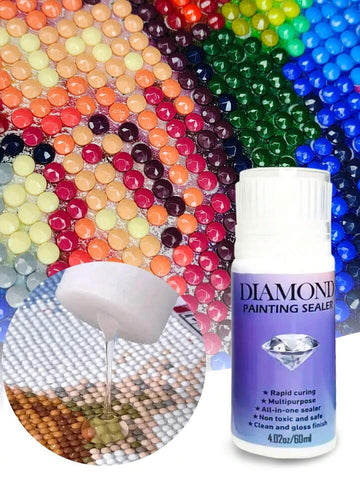
Diamond Painting Sealing Issues
The process of diamond painting sealing can enhance its longevity and appearance.
- Proper Sealing Techniques: Once your artwork is complete, apply a sealant specifically designed for diamond painting. Use a small roller to evenly apply the sealant, ensuring it gets between the diamonds.
- Common Mistakes: Avoid using too much sealant, which can cloud the diamonds' sparkle. Also, make sure not to press too hard with the roller, as it might displace the diamonds.
Advanced Diamond Painting Troubleshooting Techniques
Tackling advanced diamond painting projects can sometimes seem daunting. Here’s how to handle large and complex diamond painting kits, and ensure your artwork stays pristine over time.
Dealing with Large and Complex Kits
Large diamond painting kits offer a rewarding challenge and a stunning final product. Here's how to manage them:
Strategies for Tackling Large Projects:
- Divide and Conquer: Break the project into manageable sections. Complete one section at a time to avoid feeling overwhelmed.
- Schedule Regular Breaks: Set a timer and take regular breaks to avoid fatigue. This helps maintain your enthusiasm and precision throughout the project.
Managing Overwhelming Kits Effectively:
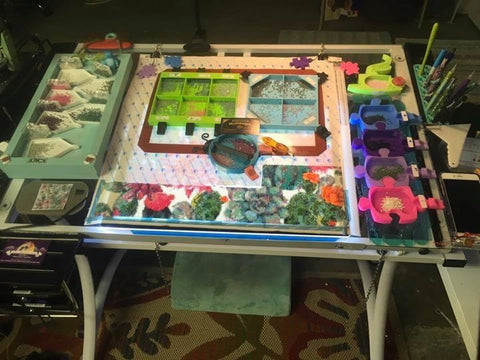
- Organize Your Workspace: Use multiple trays and label them to manage different colors of diamonds. A well-organized setup can make even the most complex kit feel less daunting.
- Progress Tracking: Keep a chart or log of your progress. Seeing how far you've come can be a great motivator and help you manage your pace.
Long-Term Maintenance of Diamond Paintings
Once your masterpiece is complete, proper care will keep it looking its best for years to come.
Tips for Cleaning and Preserving Diamond Paintings:
- Dusting: Use a soft brush or a piece of microfiber cloth to gently remove dust from the surface of the diamonds.
- Avoid Direct Sunlight: Keep your artwork out of direct sunlight to prevent the colors from fading over time.
Framing and Displaying Finished Pieces:
- Choosing the Right Frame: Choose a a frame that complements your artwork. Ensure the frame is deep enough to accommodate the diamonds without pressing against the glass.
- Sealing Before Framing: Seal properly before framing your diamond painting to ensure the diamonds are secured and protected from dust and moisture.
Perfecting Your Diamond Painting Experience
As we wrap up our exploration of common diamond painting mistakes and troubleshooting techniques, remember that every challenge you face is an opportunity to enhance your skills. Whether you're just starting out or you're an experienced artist tackling complex kits, staying informed about potential pitfalls and learning how to handle them can dramatically improve your crafting experience. By setting up a well-organized workspace, learning how to handle various canvas issues, and mastering the art of maintenance, you can ensure that each project is as enjoyable as it is beautiful.
Keep pushing the boundaries of your creativity with diamond painting. Each diamond you place is a step towards mastering this delightful art form. And as you grow more confident in troubleshooting and preserving your artwork, you'll find even more joy in every shimmering piece you create. Share your experiences and diamond painting tips with the diamond painting community online and continue to seek out resources that help you refine your craft. Happy painting, and may your diamonds always sparkle with perfection!